Sexy Cast Iron Skillet Chicken

A good friend of mine gifted me a cast iron skillet for Christmas and I was skeptical on using it, because I have never really delved into that area of expertise. Well, last night I was feeling adventurous, and I had been wanting to roast this whole chicken I had in the fridge. I’ve been reading up on a lot of posts lately with chef connoisseurs alike saying cast iron is the only way.

So there I was, in my kitchen, cracking open the package on this new and intimidating piece of hardware. I followed direction to preheat the skillet in the oven at 450F. Meanwhile, generously rubbing this 5 pounder with olive oil, and all of my favorite herbs/spices. It was still raw and it looked divine! I knew this experiment would be good, but I was also prepared for disaster. Upon much research, I was informed this was not only the tastiest way to roast a chicken and get the crispiest skin, but the fastest as well! I am an advocate for that! Mine took an hour, including resting time, and I can proudly say this was the best chicken I have ever had. It was everything you want in a roasted chicken- extra crispy skin, packed with flavor, and juicy all the way through. And the pan drippings?! Oh.. they were on a whole different level of scrumptious. We may or may not have dipped our pieces of chicken in it …

Just see for yourself:

Your mouth is watering now isn’t it? I served this with a simple salad, and it was the perfect meal. Lately my salads have been consisting of mixed greens, chic peas, bean sprouts and shaved red onion. I am in love with these flavor combinations and textures, but any salad will do. It is really the refreshing aspect of a salad alongside chicken like this that really compliments, but doesn’t overpower the amounts of flavor the chicken provides.

Do yourself a favor, and instead of going out this weekend for dinner, pick up a whole chicken (something small, 3-5 lbs), and make this recipe. If you don’t have a cast iron skillet, make sure it’s on your wishlist because this cooking style is GOLD.

Ingredients:
1 – 5 lb whole chicken
1/4 cup olive oil
4 sprigs fresh rosemary
4 sprigs fresh thyme
1 lemon, halved
1 T dried minced garlic (fresh could work too)
3 T smoked paprika
2 t kosher salt
2 T cajun seasoning (I used Tony’s)
1 1/2 T garlic powder

Directions:
1. Preheat your oven to 450F, and let your cast iron skillet get hot in the oven.
2. Remove the insides of the chicken, rise, and pat dry.
3. Stuff your chicken with 1 half of the lemon, 2 sprigs of rosemary, and 2 sprigs of thyme.
4. If desired, tie the legs of the chicken together with butcher’s twine.
5. Tuck the wings of the chicken under the bird, so they do not burn.
6. Massage the bird well with the olive oil, including under the skin, use more if needed.
7. Generously sprinkle the paprika, cajun seasoning, salt, garlic powder, and minced garlic all over the bird’s skin. Squeeze the other half of the lemon on the top of the bird. Finish with the remaining rosemary and thyme, minced.
8. Once the bird is seasoned, place it breast side up in your cast iron skillet.
9. Bake at 450F for 1 hour, or until the thermometer reaches 160F in the thickest part of the bird (normally the thigh). Once the chicken is resting it will continue to cook to the perfect temperature.
10. Halfway through cooking time, baste your bird with the pan drippings.
11. Once the chicken is done cooking, remove from the oven and let rest for 15 mins before serving. (THIS IS IMPORTANT!! The rest time will ensure your chicken is nice and juicy)

*Note: depending on the size of your chicken, cooking time may vary.

Meet The Little Green Pea!

10584089_854409171238761_1069370131317130729_n

Today I want to honor this smart and talented young woman, Alyssa Luning, RD, RDN – founder of The Little Green Pea.

Alyssa obtained a Bachelors of Science in Culinary Nutrition at Johnson & Wales University in Providence, Rhode Island. She then completed her graduate program and clinical internship at Tulane University School of Public Health and Tropical Medicine.

I am truly blessed to have this chic in my life, not only for continuously providing useful information on healthy living, but also for being a beautiful human being, inside and out.

Alyssa specializes in bariatrics and weight management, and has a passion for cooking nutritional cuisine for her friends. I have been lucky enough to cook along side this mastermind, and am happy to showcase a few of her meals I have had.

Almond lemon cupcake with a spiced peach filling and a honey buttercream.

Alyssa

A Healthy Hanukkah – (from left to right) Lentil Loaf, Radish and Roasted Beet Salad, Kale Artichoke Dip, Roasted Carrots & Asparagus, Poached Pears (all FitGirlsGuide inspired – post on that program coming soon).

Hannukah

Follow her on Facebook – Instagram & YouTube for plant based culinary nutrition!

Chocolate Frosting Shots

FrostingYes you read that right.

I’m going to share with you a healthy alternative to chocolate frosting, and you seriously wouldn’t know the difference.

I found this recipe from Chocolate Covered Katie. Katie had been determined to fit dessert in her daily life, with out all the added guilt, refined sugars and calories. I seriously suggest you check out her blog, and her new book, Chocolate-Covered Katie: Over 80 Delicious Recipes That Are Secretly Good for You.

When making this recipe, it is important you use a good brand of coconut milk (I like Thai Kitchen), and use full fat.

Katie’s recipes can be catered to your dietary needs or preferences, as I prefer to use honey than sugar. I also found it gave a creamier texture this way. Don’t worry if your mixture looks nothing like frosting! I poured mine into individual serving mason jars, and stored them in the fridge. Overnight, I was beyond myself when I dipped my spoon in this heavenly rich frosting.

Lean Three Bean Chili

Happy December Everyone!

Now that the winter season has approached us, it felt only necessary to warm up next to a hot bowl of comforting chili.

Chili can be made so many ways, from slow cooking all day in your crock pot, to quickly simmering on your stove. Being such a hearty meal, I usually slow cook my chili on days I know will be super busy. But there are just some mornings that you can’t get out of bed and forget to set your crock pot! Before you know it, it’s 7PM and you have a ton of work to catch up on, but don’t want to order take out for dinner. This recipe is for you! This chili recipe from Skinny Mom can be ready in twenty minutes and tastes like the flavors have been marrying all day.

Not only was this a super quick meal to make, it was also a great meal for the days you haven’t gone grocery shopping yet! Canned beans, tomatoes, and chicken stock are three main things that I stock in my pantry for times like this.

As you can see, the recipe is for Turkey Chili not Bean Chili .. HUH?! This recipe can be made both ways. As I mentioned, I had no food in the house but beans! Instead of ground turkey, I simply added one more can of beans. Nothing else was changed, except the omission of cinnamon.

Chili is so versatile, you can really add what you want as far as toppings – cheddar cheese, sour cream, chives, jalapenos, sliced avocado, fresh chopped tomatoes, sliced olives, crushed tortilla chips or shredded lettuce. Go wild!

My Famous Deviled Eggs

I am sharing my famous recipe for deviled eggs. I make these every event I attend, and they barely last a few minutes.

Many people get too crazy with deviled egg recipes. But mine is simple, and delicious.

Ingredients:
1 dozen eggs
1/2 cup Mayo
Salt
Pepper
Paprika

YES! It really is that simple. No mustard.

Directions:
Add eggs to a pot of water. Bring to a boil. Once it boils, turn off the stove. Let your eggs sit in the hot water for 10 minutes. Then immediately drain all hot water, and run under cold water for 5 minutes. Peel eggs, and remove yolks. Add mayo, salt and pepper to your yolks. With a hand mixer, blend mixture until creamy. The key to this recipe is understanding it will vary every time. You MUST taste your yolk filling. Adjust from there. You want your filling to taste more like mayo, than egg. But don’t go mayo crazy. You can alaways add more, but you cannot take away. Remember, salt also goes a long way with this. Once it is perfect, put filling into a plastic bag. Cut the corner of the bag, and pipe your filling into the egg whites. Sprinkle a bit of paprika on top, and watch the hawks dive in!
20150517_132711

Keezer Build

Here it is!! The long awaited keezer my boyfriend and I have been wanting to build for over a year. His birthday is coming up, and I’m throwing him a huge beer tasting party. So I figured, since our favorite hobby is home brewing, it would be awesome if we could showcase our beer to everyone in a keezer.

Keezer = chest freezer with kegs

This project took 5 days to complete (about 4 hours each day). We ran into some difficulties due to the weather being so hot and humid, but alas, minor imperfections and all, I am so proud of this!

Supplies:
Magic Chef 6.9 cu feet chest freezer
Eva-dry Renewable E-333 Wireless Mini Dehumidifier
AC Infinity LS8038A-X Standard Cooling Fan
Inkbird All-Purpose Digital Temperature Controller
4- Draft Warehouse Beer Faucet and 4-Inch Shank Kit with Black Handle
4 Tap Picnic Faucet Home Brew Kegerator Fully Assembled (came with all beverage lines, gas lines, 4 way gas manifold, co2 tank and regulator)
1×10 10 ft Common Board
Varathane 1 qt. Kona Premium Wood Stain + Poly
3- 12 oz. Flat Black General Purpose Spray Paint
8x6x3 Project Box in black
6 ft Power cord
20 AMP outlet
Outlet wall plate

Step 1 – We wanted a black freezer, but could not find any store that sold one for a low price. So we bought a white one, and spray painted it matte black. Removed the lid, and patched up the vents.

Snapchat-5337958482362485608

Step 2- Build a collar. The reason we had to build a collar, was to have something to attach the taps to, while not having to drill into the freezer itself. Also, in order to fit 4 corny kegs, 1 keg had to sit on the hump, so 1×10 would give us enough room to do so. Using a 7/8″ spade bit, we made holes in the wood for the taps. I will admit, this was a very tight fit, but we made it work. We did not have access to a saw that would give us angles, so we improvised, and used liquid nails to seal the wood, and support from screws.

Snapchat-7214121213977205806

Step 3- Stain the wood. At first I was having an issue with the stain getting darker. But quickly realized, due to the humidity, the stain was not fully drying therefore the second coat would not stick. I took the piece into the house to dry in air conditioning for awhile, and from there the stain worked flawlessly. We purchased a stain that had polyurethane in it, so it was an easy one step process.

Snapchat--896436529633708394

Step 4- Attach the collar to the freezer. We did so by using silicone. The silicone created a nice seal, and if something ever happens to the freezer where we need to replace it, the collar can be removed, and used again on a new freezer.

Snapchat-6334250636914552746

Step 5- Once the silicone has dried, and the collar is attached to the freezer, reattach the lid using wood screws.

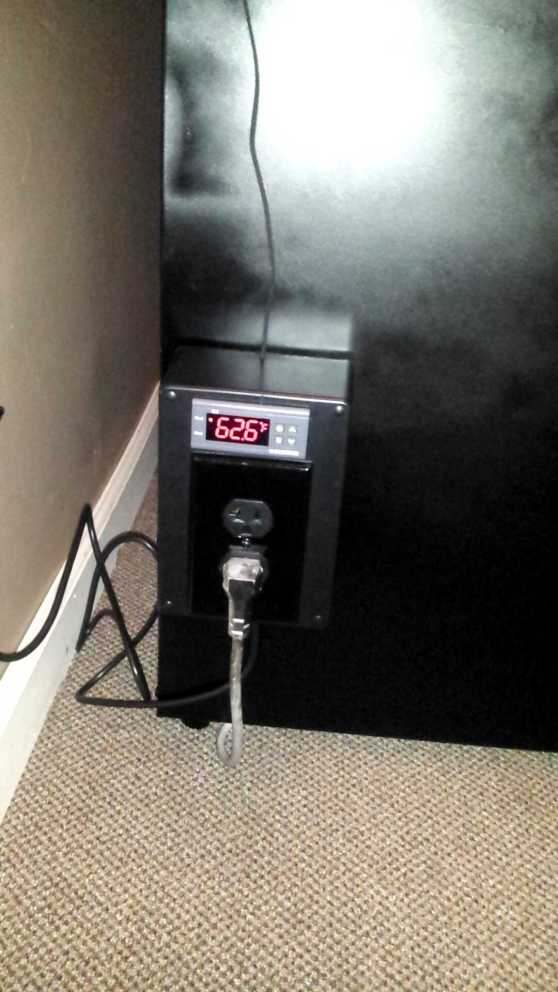
Step 6- Wire the temperature controller, and add to the project box. Keep it at a temperature between 38F-42F.

1434586300190

Step 7- Transfer your beer to kegs.

1434578091237

Step 8- Hook up your beverage lines to the shanks. Hook up your gas lines to the manifold and CO2 tank.

Step 9- Attach the gas line to the keg (we did at 30PSI), and purge 3 times until all air has escaped the keg.

Step 10- Place kegs in keezer, and carbonate at 30 PSI for 48 hours.

1434585567667

Step 11- Change PSI to 12. Test beer, to see if you like the carbonation. If it is not ready, bump it back up to 30 PSI for another 12 hours. Check again. If it is too carbonated, purge the keg.

Step 12- Enjoy your keezer and throw a party to dispense all the beer!

TADA!

10354610_10152867193330759_3502487571076795553_n

Soon to be updated: I bought a dehumidifier, to keep the freezer dry and condensation free. I also bought a fan, to circulate the cold air. Many people have issues with their beer coming out foamy, because the bottom of the freezer is colder than where the beer lines are located. Warm beer = foam. The fan will prevent this.

Salad Nicoise Redux

IMG_20150512_132657Another recipe idea from the FitGirlsGuide 28 Day Jump-start.

Ingredients:
1 Yellow Pepper
Green peas, frozen
Chicken
Avocado
Greek Yogurt
Lime
Green beans
Red Bliss potatoes
Cilantro
Dried dill

Directions:
1. Steam green beans. Boil potatoes. Chill.
2. In a 400F oven, roast bell pepper unit soft but will still hold it’s form.
3. Mash avocado, Greek yogurt, dill, salt, pepper, lime juice. Add to shredded chicken, peas, a cilantro.
4. Spoon mixture into half of a pepper.
5. Serve with a side of low calorie dressing. I used a lite Caesar.

**I did not write down an exact recipe for this. I improvised, and tasted along the way to my liking.

Gnocchi with Brown Butter Sauce

10410577_10152776641940759_7095539157681312170_nAnother one of my genius/no food in the house concoctions. This was a big hit with the boyfriend.

Ingredients:
1 Package of gnocchi
Handful of broccoli
Jalapeno chicken sausage, sliced
1/2 stick butter
2 cloves garlic, minced
1 small shallot, minced

Directions:
1. In medium saucepan, add butter, garlic and shallots. Cook on low, until butter turns slightly brown. Wait until all the foaming subsides.
2. Meanwhile, cook your gnocchi in a pot of boiling water. It is done when it floats to the top. Strain.
3. In another pan, cook the broccoli and sausage.
4. Add the cooked gnocchi to your butter pan.
5. Toss with the chicken sausage and broccoli.
6. Sprinkle with a bit of shredded Parmesan.

Grilled Sirloin Steak

11140107_10152773601730759_5564632257978717176_nMy boyfriend’s specialty is steak. Over the years, he’s gotten more creative with cooking (no more Ramen for this guy!), and steak is his favorite thing to cook. I must say, I am super impressed with his steak skills. We can thank Gordon Ramsey for that on YouTube.

He knows I’m a snob for really tender steak (I usually order a filet mignon, even though the cut lacks flavor). He’s gotten me to enjoy a sirloin, which definately has significant flavor.

He uses a big blend of spices, and creates almost a crust on the steak (WARNING: spicy!). I don’t know how he gets it perfect everytime, but this is one dish I know I can sit back and wait for.

Baked Honey Mustard Chicken

This recipe comes from Good Life Eats and it is so flavorful and simple.

This is one of those recipes you can make ahead, cover and refrigerate, and cook when you’re ready.

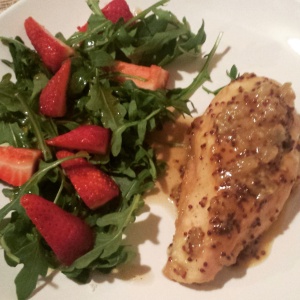
Don’t be scared by the thought of eating whole grain mustard. The honey really cuts the flavor, and it’s perfect with an arugula salad.

IMG_20150603_004137